For : Mepis Linux
by : je.saist
| This guide focus's on the installation of a localized printer
to Mepis Linux. A localized printer is one that is attached by
either a parallel port, a serial port, or a USB port. This guide
uses a USB printer attached through an old Asus P5-A board. Let's get to work 1: First step is to open the KDE Control Center. In recent versions of Mepis, it is in the lower left hand corner.  2: The KDE Control Center should open up and give you a welcome screen.  3: Click on Peripherals  4: Under peripherals Click on Printers  5: Now, you can add a printer without having to login to root. However, to be on the safe side of the install, look to the bottom of the Control Center. There should be a button labeled Administrator Mode. Click the Administrator Mode button  6: KDE will now ask for the Root Password Enter the root password and Click OK  7: Screen suddenly got a lot busier. This is not as bad in higher resolution modes. 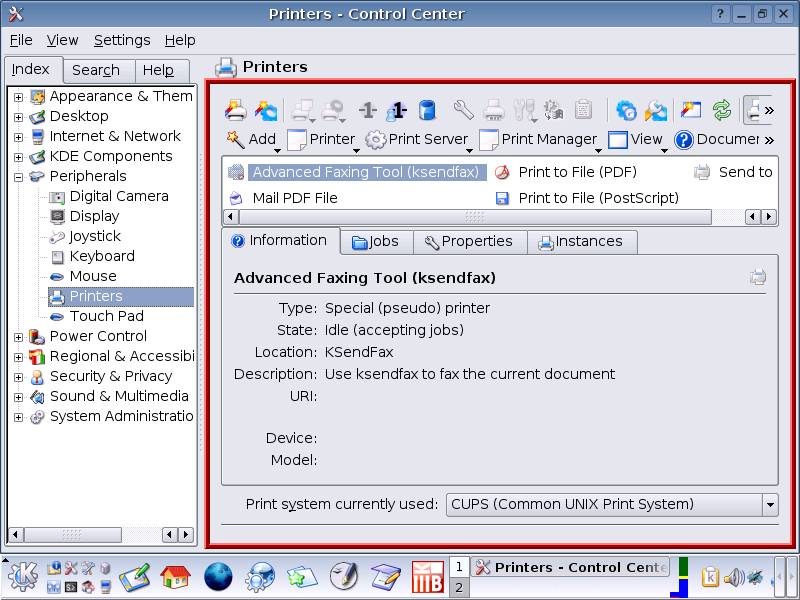 8: There should be a Button labeled Add Click on Add  9: Underneath Add there should be a line that states Add Printer/Class Left Click on Add Printer/Class  10: KDE's print wizard will now say hello. Click Next  11: KDE has several options listed for what printers it can install. Most of these are pretty clearly labeled, so don't worry about them. The only one we are interested in is the Local Printer  12: Left Click the dot next to Local Printer Then Click Next  13: KDE will now list the locations for the printers. If you are using a Parallel port the location is fairly obvious. Anyways, since this printer is using USB, we need to scroll down the list.  14: The nice part is that most USB printers will list themselves under the USB segment. In this case, the USB printer I'm using is clearly listed, and identified. It's an HP Photosmart 7350  15: Once the printer has been located, Left Click on the Printer Then Click Next  16: KDE will now load the drivers it has for the printer. This may take a few minutes. Visit Some Roomies while you wait.  17: Okay, KDE now has has the list of supported printers up. First, find the brand of your printer under Manufacturer  18: In this case the brand I'm using is Hewlett Packard, or HP. Second, find the model of your printer under Model  19: Most HP printers are well supported under Linux. In this case my 7350 is listed. Make sure you have clicked on your model and that the model is highlighted  20: Once your printer is selected, Click Next  21: One of the reasons why HP is a good choice. hpijs http://hpinkjet.sourceforge.net/ KDE is pretty intelligent about picking working drivers, so just Hit Next  22: At this point KDE will allow you to test the printer. If you have done this install without entering root you will be prompted to enter the root password when you hit test. Go ahead and click test  22a: You should get this out of your printer  23: If you get a properly printed CUPS test page, Click Next  24: You can always change this later, but these banners can put items such as the date, time, or the printer from which the pages came from. Unless you really want to put banners, Hit Next  25: Worried about your (about to be ex) best-friend using your printer to print everything under alt.binary? At this point you can set size and page quotas for your printer. The average user probably won't care about this, so just Click Next  26: I really didn't mess around with this when creating this guide. The User Access settings are more likely to be used in a corporate environment where only certain people can use a printer. If your doing a single printer or a small network, just Click Next  27: You will need to enter a name for the printer.  28: Location, however, is optional. Once you have the name filled in, Click Next  29: KDE will now summarize the installation. Click Finish If you have not entered the root password, you will be asked to enter the root password at this time by a pop-up dialog box.  30: And the printer should now be listed and accessible to the rest of the system.  take me back to the Printer Blitz. take me back to the guides  |