Using Adobe Post Script
For : Mepis Linux / Microsoft Windows
by : je.saist
| While sharing printers within a Mepis Network is easy,
sharing across to a Windows Computer on the network is by contrast
painful. Buckle down, this is going to require some work. This guide focus's on using Adobe's Postscript to share your Mepis Printer with Windows. This solution can be completed across Windows 98, 98 Second Edition, ME, Win2k, and Windows Xp. It currently does not function on Xp64 Release Candidate 2, I doubt it would function on the final release of Xp64 either. However, Adobe's PostScript option does have a few issues. Color printing may not be available, and other printer-side options are not available. It also is not possible to change the quality of the print, or modify the printed image. This Guide Requires that the Mepis Printer is already shared If you have already set the Mepis Printer to be browseable, lets get started. This guide is built using Microsoft Windows 2000 Professional SP4. 1: the first step is to obtain the Adobe Printer Drivers. They are located at http://www.adobe.com/products/printerdrivers/  2: Scroll down the page On the Left Hand Side there should be a Latest Printer Drivers Box Click on your version of AdobePS (actually, you can click on any of them as shown next)  3: Strangly enough, all of the Windows installers available are in the Version 1.0.5 Universal Installer Click on the Universal Installer Link  4: We should now have the drivers page up.  5: Look down the list for the Universal Installer in your language. Click on the Installer  6: When the Installer Page loads, Look on the Left Hand Side. Click on the Red Download Button 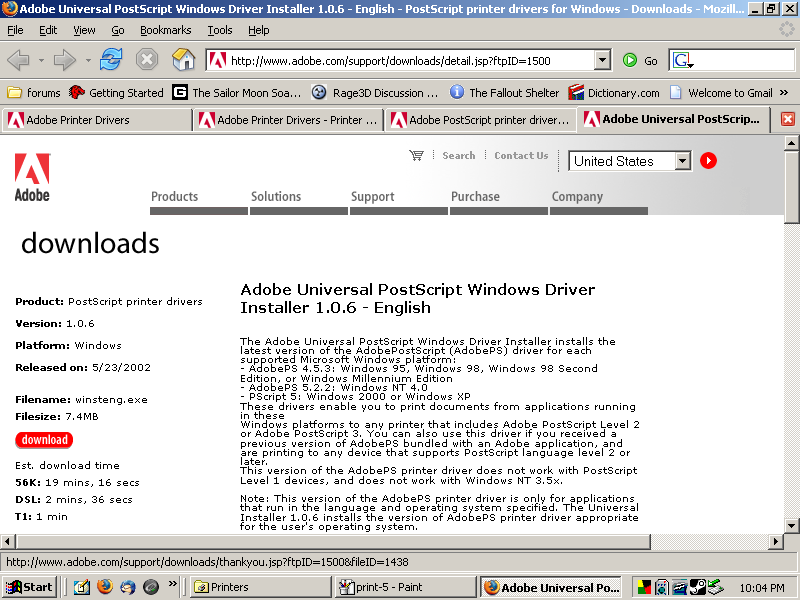 7: The download page itself should now load. Click on the red download button  8: You will want to save the application to the harddrive. If you are using Opera or FireFox, it really doesn't matter where you save the file too.  9: When your download finishes, simply Click Open in the download manager  10: Alright, time to work through Adobe's installer. Click Next  11: Click Accept to accept Adobe's license.  12: Since we are going for a network computer Select It is connected to your network (Network Printer) Then Click Next  13: Alright, unless you remember where your printer is at, click browse  14: Adobe will start searching in the Microsoft Windows Network Something to keep in mind here. If you have different login names for each computer, you probably want to browse Network NeighborHood first and get any logins out of the way. Also, if you plan to go over to a different network name, you probably need to make sure your logins are taken care of first. Hit the plus sign next to Microsoft Windows Network (or just double click on it)  15: Find your listed network Double Click on your network name (although a single click will work on some systems)  16: Find your computer Double Click on your computer (or single click, again, it's depending on how Windows is configured)  17: Left Click Once on the printer  18: Then Click OK  19: Adobe should now list the network location of the printer. Click Next  20: Adobe will now warn you that the printer is not using the Adobe Driver.  21: Click Yes  22: Click Next to accept the generic driver  23: Adobe will now ask if you want to print a test page. If you have multiple printers installed, the option to set as a default printer will not be greyed out as demonstrated below. Click Next  24: Click Install to actually install the driver  25: It is not needed, but if you want to configure the printer, select yes, then click next  26: There aren't that many options to configure. But if you want to know what it looks like. Hit Ok when you want to move on.  27: Click Finish  28: If you check your Printers there should now be a Generic PostScript printer.  29: What follows is the test page that should result from a succesful connection. This was also the only time I got the Adobe driver to print in color. ") (click on the picture to find out what was
behind the scan)
take me back to the guides  |